 |
An extremely useful feature of the GIMP is its ability to perform multiple undos and redos. The Undo function is found in the Image:Edit menu, as is the Redo function. These two functions are so useful and are employed so often that you will want to immediately memorize their keyboard shortcuts. These are C-z for undo and C-r for redo.
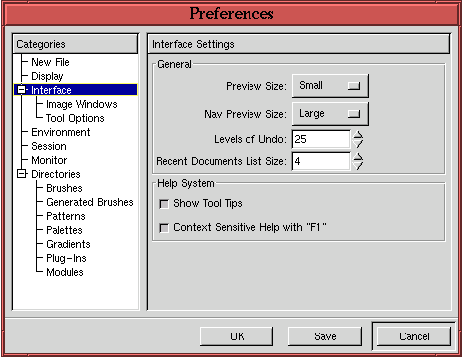
The number of undos that can be performed in the GIMP is controlled by
the Interface branch of the Preferences dialog, and the Preferences dialog is found in the Toolbox:File menu. Figure 1.12
![[*]](cross_ref_motif.gif) in the README for more on how to budget your RAM.
in the README for more on how to budget your RAM.
An amazing feature of the GIMP is the Undo History
function found in the Image:View
menu. When invoked, this function displays a palette of thumbnails,
each representing an image state in the sequence of operations
performed on your image. Figure 1.13
In Figure 1.13, note how the highlighted thumbnail in the Undo History dialog indicates the current status of the image displayed in the image window. Performing an undo by typing C-z in the image window moves the highlighted thumbnail to a layer higher in the thumbnail stack, and performing redo with a C-r moves the highlighted thumbnail a layer lower. Furthermore, you can select any layer in the Undo History dialog at any time by clicking on it.
In this way, you have access to any prior version of the image available in the Undo History by one of two separate methods. The first is by repeatedly pressing C-z in the image window until arriving at the desired state. The second is by directly clicking on the corresponding thumbnail in the Undo History dialog.