The Qt toolkit contains everything you need to write your own Qt programs. Lots of classes are available. Some of them are visible and are meant to be used as user-interface classes. Some of them are invisible, and they are there to make your programming simpler.  | Keep in mind that it is better to use KDE classes than QT classes, when available. That ensures that your KDE programs will look and feel like all other KDE programs. KDE may also use the KDE features better. However, you must know some Qt. The Qt features I present to you in this chapter are vital for many KDE programs. |
A utility program called the Meta Object Compiler, or moc, is also included with Qt. It processes header files to enable easy event handling, an important topic in modern GUI programming. I'll write more about it later in this chapter. QObject is the base class in Qt. All classes that have signals or slots must inherit from this class, directly or indirectly. QPushButton is an example of a class that inherits from QObject indirectly. QPushButton inherits from QWidget, which inherits from QObject. Therefore, QPushButton inherits indirectly from QObject.  | Signals and slots enable easy event handling in Qt. They are explained in detail in "Signals and Slots" later in this chapter. |
| |
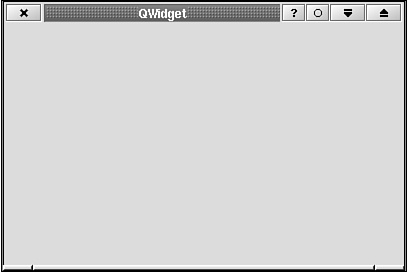
QWidget is the base class for all visible classes in Qt. The QWidget simply represents an empty area (see Figure 3.1). You use the QWidget class whenever you need an empty area. It is often used to create windows in your programs. The constructor for QWidget is The most important parameter is parent. If you want to create a new window and put the widget inside it, you set parent to 0. The window manager will draw the window for you. When you put your widget inside a window, parent must contain a pointer to the parent object. The parent object is the object that you want to put your widget on. The other parameters are rarely used. The parameter name gives your widget a name. The parameter f is a flags parameter. If a window is created for the widget, you can control the behavior of the window with this parameter. To move and resize the widget, use the following function: The left andtop parameters specify the upper-left corner of the widget. The width and height parameters specify the dimensions of the widget. To show the widget, use the following function: Widgets are created invisible by default and must be shown to be seen. The function that handles mouse press events is You can implement it if you need to create a mouse button handler. The parameter event gives you important information about the mouse press event (such as cursor position and button status). The function that handles mouse move events is Implement this function if you need to handle mouse cursor move events. The mouse cursor position and button state are given by the parameter event. The following function is called when the graphics are updated: You should implement this function if you have drawn graphics on the widget. Use the QPainter class to draw graphics (see the section "Qpainter" later in this chapter). The graphics will disappear if you don't redraw them. The parameter event contains information about where the graphics needs to be updated. The function you use to set the caption is If your widget has its own window (parent=0), the window title is set by this function. This is a slot (see the section "Signals And Slots" later in this chapter). | |
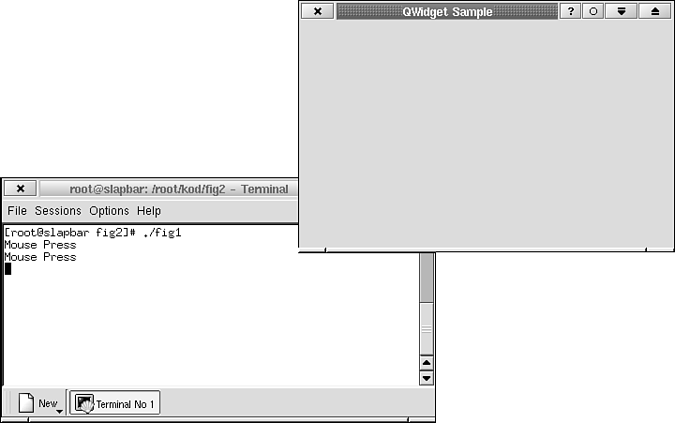
Listing 3.1 shows how you use the QWidget class. The program creates an empty window. When a mouse button is pressed, the program prints Mouse Press on the console (shown in Figure 3.2):
Example 3.1. widget.cpp: A Window with Mouse Handling 1
2 1: #include <kapp.h>
3 2: #include <qwidget.h>
4 3: #include <iostream.h>
5 4:
6 5:
7 6: // A Window class definition
8 7: class MyWindow : public QWidget
9 8: {
10 9: public:
11 10: // Constructor, Parent is always 0 for windows
12 11: MyWindow() : QWidget() { }
13 12: protected:
14 13: // This function will be called when the user presses a mouse button
15 14: void mousePressEvent(QMouseEvent *);
16 15: };
17 16:
18 17:
19 18: void MyWindow::mousePressEvent(QMouseEvent *)
20 19: {
21 20: // Print "Mouse Press" on the console
22 21: cout << "Mouse Press" << endl;
23 22: }
24 23:
25 24:
26 25: int main(int argc, char **argv){
27 26: KApplication app(argc, argv);
28 27:
29 28: // Create a MyWindow object
30 29: MyWindow window;
31 30:
32 31: // Move and resize the MyWindow object
33 32: // left=200, top=200, width=400, height=300
34 33: window.setGeometry(200,200,400,300);
35 34:
36 35: // Main window = MyWindow object
37 36: app.setMainWidget(&window);
38 37:
39 38: window.setCaption("QWidget example");
40 39:
41 40: // Show the window
42 41: window.show();
43 42:
44 43: // Go to the main loop
45 44: return app.exec();
46 45: }
47 |
| |
| |
QWidget and its children cannot draw graphics, and that's why QPainter is needed. QPainter draws graphics on widgets. The constructor for QPainter is Before you can draw any graphics on a widget, you must call the following function: In the parameter pd (Paint Device), you tell QPainter on what object you want to draw graphics. To draw a line, for example, use the following function: The parameters are simple; they define the start and end points. A line will be drawn between these two points. The coordinates are relative to the object that you draw on. This is not the only graphics operation you can perform, but it is the only one presented here. Functions are available that draw circles, bars, rectangles, and almost anything you can imagine. The Qt reference contains all the information you need. As I have written before, I recommend that you download the Qt documentation from the trolltech Web site (http://www.trolltech.com). To flush graphics, use the following function: QPainter uses a buffered system. Graphics operations are stored in memory only—they do not affect what you see on the screen. This function flushes the graphics in memory to the screen. The destructor for QPainter flushes automatically, you don't have to flush if your QPainter object is destroyed when all the graphics have been drawn. When you don't want to draw more graphics on the current object, you can use the following function: Use this function when you have been drawing on one widget, and you want to switch to another widget. | |
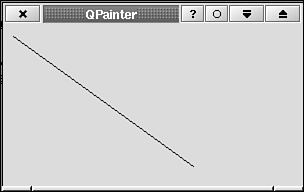
Listing 3.2 shows you how the QPainter is used. The QPainter is used in the paintEvent function and is shown in Figure 3.3.
Example 3.2. Drawing a Line in a Window 1
2 1: #include <kapp.h>
3 2: #include <qwidget.h>
4 3: #include <qpainter.h>
5 4:
6 5: class MyWindow : public Qwidget
7 6: {
8 7: public:
9 8: MyWindow() : QWidget() { }
10 9: protected:
11 10: void paintEvent(QPaintEvent *);
12 11: };
13 12:
14 13: void MyWindow::paintEvent(QPaintEvent *)
15 14: {
16 15: // Draw graphics on this object
17 16: QPainter paint(this);
18 17: // Draw a line (the destructor will make the line visible)
19 18: paint.drawLine(10,10,190,140);
20 19: }
21 20:
22 21:
23 22: int main(int argc, char **argv)
24 23: {
25 24: KApplication app(argc, argv);
26 25: MyWindow window;
27 26: window.setGeometry(50,50,200,150);
28 27: app.setMainWidget(&window);
29 28: window.setCaption("Qpainter");
30 29: window.show();
31 30: return app.exec();
32 31: }
33 |
| |
| |
You use QPushButton when you need a button in your program. QPushButton is derived from the QWidget class. The constructor for QPushButton is The parameter text specifies the button caption. The parameter parent is a pointer to the object that you wish to put the button on. The third parameter, name, is not important. The following signal is emitted when the button is clicked: Buttons can be clicked by the mouse or by the keyboard. | |
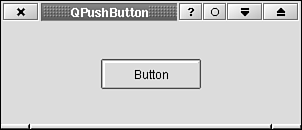
The QPushButton class is mainly used to put buttons inside windows. Listing 3.3 demonstrates this and is shown in Figure 3.4:
Example 3.3. A Window with a Button in It 1
2 1: #include <kapp.h>
3 2: #include <qpushbutton.h>
4 3: #include <qwidget.h>
5 4:
6 5:
7 6: // The window class
8 7: class MyWindow : public QWidget
9 8: {
10 9: public:
11 10: MyWindow();
12 11: private:
13 12: QPushButton *button;
14 13: };
15 14:
16 15:
17 16: MyWindow::MyWindow() : QWidget()
18 17: {
19 18: // Create a new button; caption="Button", parent=this
20 19: button = new QPushButton("Button", this);
21 20:
22 21: // Move and resize the button
23 22: button->setGeometry(50, 10, 100, 30);
24 23:
25 24: // Show the button
26 25: button->show();
27 26: }
28 27:
29 28:
30 29: int main(int argc, char **argv)
31 30: {
32 31: KApplication app(argc, argv);
33 32: MyWindow window;
34 33: window.setGeometry(200,200,400,300);
35 34: window.setCaption("QPushButton Example");
36 35: app.setMainWidget(&window);
37 36: window.show();
38 37: return app.exec();
39 38: }
40 |
| |
| |
| |


