Layer masks are special layers that are only 8 bits deep and that represent the alpha channel of an image layer. The main difference between channel and layer masks is that the layer mask represents the alpha channel of the layer it is linked to, whereas channel masks represent selections and exist independently of any particular layer. Nevertheless, as will be seen later in this chapter, there is an intimate relationship between alpha channels and selections and, by extension, between layer masks and channel masks.
The interpretation of white, black, and gray pixels in a layer mask is slightly different than that for a channel mask. A layer mask represents an alpha channel, which, in turn, controls the transparency of a layer. In this context, for the layer mask, white represents 100% opacity, black 100% transparency, and gray an intermediate level of opacity/transparency. This section describes the basic operations that can be performed on layer masks.
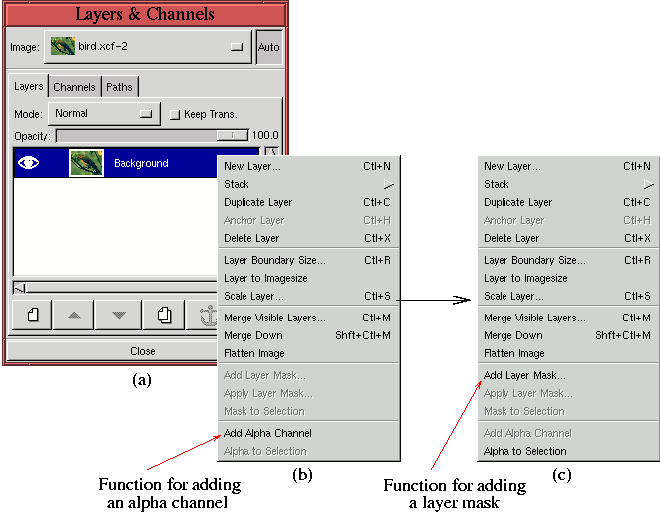
To create a layer mask, make the desired layer active in the Layers dialog and choose Add Layer Mask from the Layers menu. This creates the layer mask, but only if the active layer already has an alpha channel. If it does not have an alpha channel create one using Add Alpha Channel from the Layers menu.
Figure 4.11(a)
Selecting the Add Layer Mask function from the Layers menu brings up the Add Mask Options dialog. This dialog allows a choice of three initial states for the new mask. The default is White (Full Opacity), which is what you will choose most often. This choice produces a layer mask that leaves the image layer fully opaque. It can sometimes be useful to choose the second option, Black (Full Transparency), which creates a layer mask that makes the image layer fully transparent. The final option is Layer's Alpha Channel, which loads the active layer's alpha channel into the layer mask.
Figure 4.12
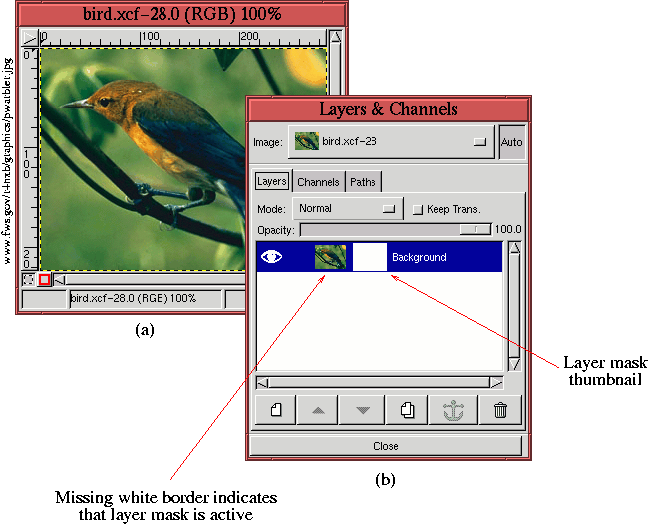
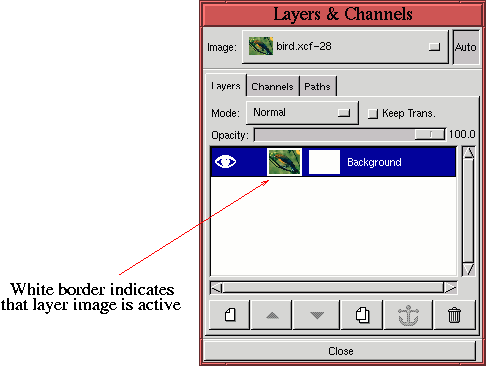
As was first described in Section 2.1.1, the active layer in the Layers dialog is highlighted in blue. When the active layer consists of an image layer and a layer mask, only one of these two components can be active at a time. Operations performed in the image window affect the active component of the layer, either the image or the layer mask. The layer mask is made active by clicking on the layer mask thumbnail. The active focus is returned to the image by clicking on the image thumbnail.
You can determine whether the image or the layer mask is active by a
white border drawn around the appropriate thumbnail in the layer
strip. However, if the layer mask is white, it may be difficult to
tell that there is an additional white border around it. Carefully
examine Figure 4.12(b). Here it can be seen that
the image thumbnail does not have a white border and that the layer
mask thumbnail looks a little taller than the image thumbnail. This
is a clue that the layer mask is active. Changing the active focus
from the layer mask to the image by clicking on the image thumbnail is
shown in Figure 4.13.
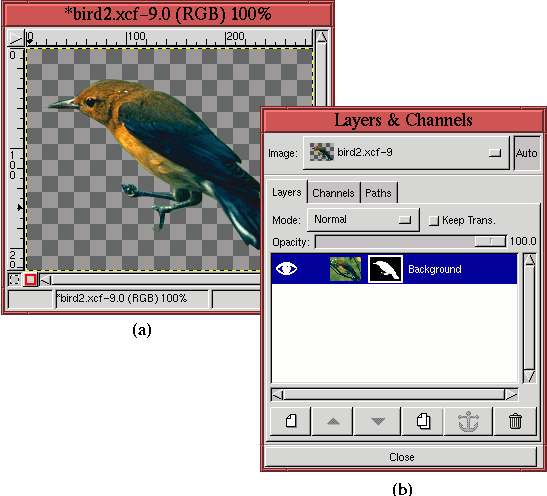
A layer mask is a direct way of editing an image layer's alpha
channel. Thus, performing
edits on the layer mask changes the opacity of the corresponding image
layer. This is illustrated in Figure 4.14.
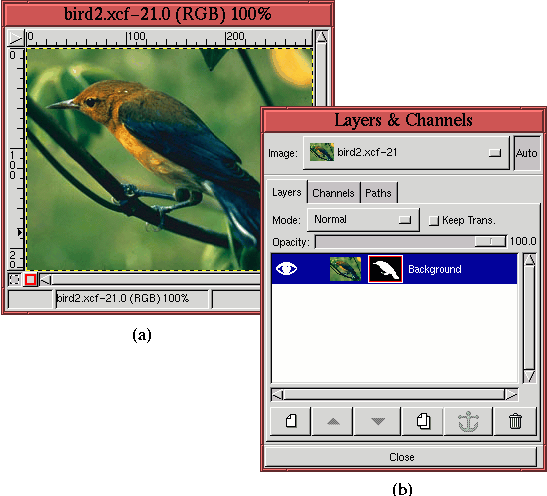
Figure 4.14(a) shows the effect of the layer mask; it makes the region around the bird's body completely transparent. It is important to note that the background part of the image has not been destroyed; it just can't be seen due to the modified values in the alpha channel. Section 4.3 describes in detail how a layer mask can be edited to produce a result like the one shown in Figure 4.14. However, before doing that, several additional features of layer masks must be described.
It is often useful to be able to examine the layer mask without the
visual interference of the image layer. This can be accomplished by
Alt-clicking on the
thumbnail of the layer mask. Doing this toggles off the visibility of
the image layer in the image window, leaving just the layer mask. In
addition, the outline of the layer mask thumbnail in the Layers dialog
becomes green. This is illustrated in
Figure 4.15.
Similarly, it can be useful to toggle off the visual effect the layer
mask has
on the image. This is done by Control-clicking on the layer mask
thumbnail. When this is done, the effect of the layer mask on the
image is toggled off, and the border of the layer mask thumbnail
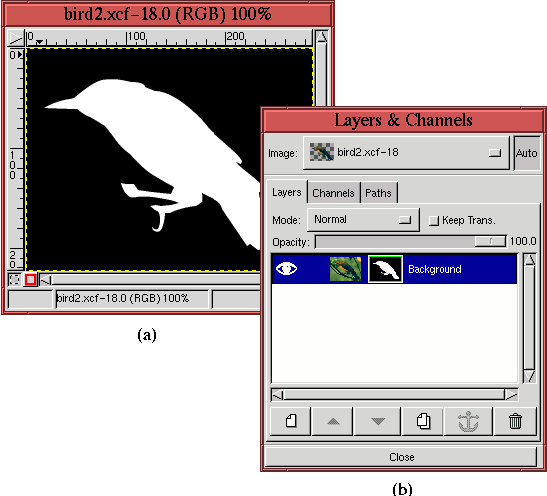
becomes red. Figure 4.16
A layer mask can be converted to the image layer's alpha channel by choosing the Apply Layer Mask function from the Layers menu. This is not normally necessary, though, because the action of the mask is the same whether it remains a mask or is converted to the alpha channel. However, the Apply Layer Mask dialog also permits the layer mask to be discarded. This is the only way to remove a layer mask. Applying a layer mask by converting it to an alpha channel destroys the mask and removes it from the Layers dialog. It can be recovered, though, by choosing Add Layer Mask from the Layers menu and choosing Layer's Alpha Channel as the mask option.
Finally, a layer mask can be converted directly to a selection. This is done by choosing Mask To Selection from the Layers menu. This operation creates a selection by mapping the white pixels in the layer mask to selected pixels in the image window, black pixels in the layer mask to unselected pixels, and gray pixels in the layer mask to partially selected pixels. Note that applying the mask as a selection does not destroy the mask.